Gallery of Art
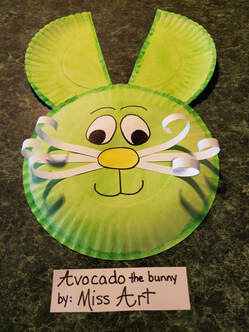
Meet Avocado the bunny! He got his name because he is green, like the fruit. Did you know an avocado is a fruit? That's right! It's a fruit that people use like a vegetable. Avocados are really good in a dip called guacamole. You pronounce it like this: gwak-uh-mo-lee. Guacamole is made by mashing avocados and mixing them with chopped tomatoes, onion, and some seasonings. There are lots of recipes on the internet. Some of the recipes use jalapeno pepper, too. Hello, spicy! After you stir everything together, you get a big bowl of tortilla chips and dig in! Guacamole is yummy! You might want to try it sometime. Go to the activities page to see how to make a bunny for yourself.
________________________________________________________________________________

Here's my Painted Salt Easter Egg. This was a really interesting project! It was fun touching the paintbrush to the salt and seeing the colors run together. The hardest part was trying to be careful when squeezing out the glue so it didn't make big blobs. Easy squeezing worked best! After I sprinkled on salt, I had to wait a long time for the glue to dry. The white salt looked very sparkly on my egg design. Do you know why salt sparkles? I looked it up on the internet to be sure. I learned that each tiny grain of salt is a crystal with facets all over it. A facet is a flat side that reflects light. So, if one eeny, weeny grain of salt has a little sparkle to it, then thousands of grains of salt have lots of sparkle! Just remember, where you're adding salt to your french fries, you're adding sparkle! Go to the activities page and I'll tell you how I made this egg.
________________________________________________________________________________
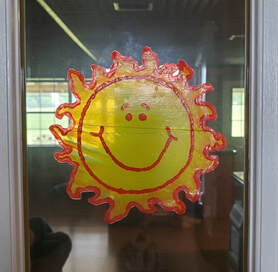
This is Shine! Such a happy little sun! Shine needed a lot of patience from me. Do you know what it means to have patience? That's when you have to wait for something without getting upset. Sometimes it's hard to have patience. All of that waiting around! You might begin to ask yourself, "Will the waiting never end?!". Often, having patience results in being rewarded with something good. Like getting to see Shine all finished up and looking spiffy! Click on the activities page to learn how to make window clings.
________________________________________________________________________________
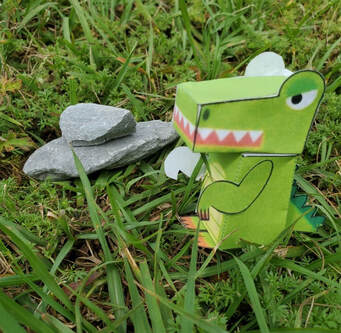
Say hi to Ally the Allosaurus! This little paper dinosaur toy was fun to make. I didn't even have to add color because the paper was already colored in! I did have to do a lot of careful cutting with my scissors. Using a toothpick to apply glue to the right areas helped keep it from getting really messy. Did you know that the Allosaurus lived about 90 million years ago? That's an extremely long time ago! Also, they could grow up to 16 feet tall and weigh over 1 ton. That dinosaur was a humongous animal! If you would like to make an Ally for yourself, go to the activities page and scroll down until you see it.
________________________________________________________________________________
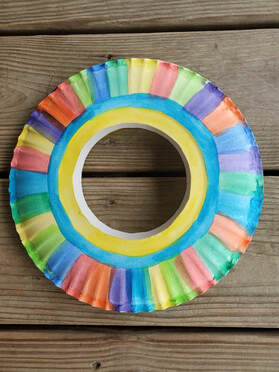
Here's my paper plate frisbee. While I was trying to take a picture of this, my dog, Bartimus, wanted to grab it! It definitely wouldn't last long if he got a hold of it! I might have to buy him a frisbee designed for dogs. I enjoyed painting this project. It was relaxing just adding lines of color without having to keep my mind on painting in a more complex design. A complex design means one that has more details. Markers would work well on this project, too. Just try not to push down too hard while coloring or you might flatten the plate. If that happens, you could probably push the flattened area back up with your hand underneath the plate. Time for a little frisbee history. Back in the late 1800's in the state of Connecticut, there was the Frisbie (yes, ie at the end, not ee) Pie Company. They made pies in metal pie plates to sell. If you bought a pie, you got to keep the metal plate. Some college students came up with a game where they would throw the plate to each other while yelling, "frisbie!" as they let go. Many years later, two business men invented a plastic version to sell as a toy. A toy company called Wham-O started to produce the toy, except they misspelled the name and called it the frisbee. They are still made today and disc golf uses frisbees. That's a sport that is played all around the world. If you want to know how disc golf is played, look it up on the internet!
________________________________________________________________________________
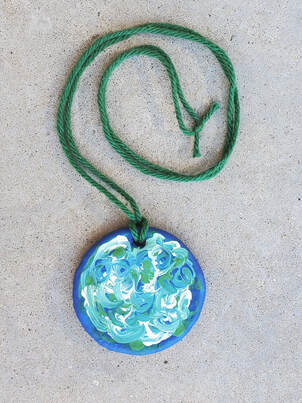
I made this Swirled World necklace for Earth Day out of homemade air dry clay. See my art activities page for complete instructions! It was really messy making the clay. I had to begin mixing it together in a cup, but then I had to use my hands to finish. I had sticky bits all over my hands! Part way through the mixing, I had to stop and wash the sticky bits off. After that, it wasn't so messy and I made some soft, bright white clay. Since Earth Day was coming up, I decided to form my clay into a flat circle to represent the Earth. I thought about painting the continents and the oceans on it. Do you know how many continents and oceans there are on Earth? If you can subtract 3 from 10, you'll have the number of continents. If you can add 3 and 2, you'll have the number of oceans. Painting all of those continents and oceans sounded like a lot of work. Plus, I would need to add clouds because our planet is covered in them. After thinking a while, I decided to place dots of blue paint for water, green paint for land, and white paint for clouds. Then, I just swirled the colors together! It was fast! And, fun, too!
________________________________________________________________________________
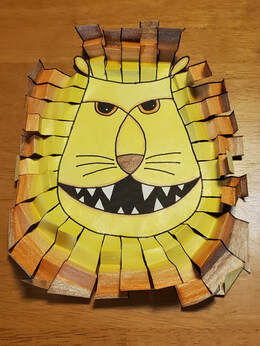
I would like to introduce Leonardo! When I saw this idea on the website krokotak (see my websites page!) it reminded me of the famous artist, Leonardo da Vinci. Do you remember him from art class? He was the one who painted the most famous painting in the world, the Mona Lisa. When I was looking at Leonardo (the lion), the first thing I noticed about him was all of that wild, crazy mane. I thought, "That's looks just like Leonardo's (the artist) wild, crazy hair!" So, I went on the internet and found the picture of Leonardo (the artist) that I was thinking of and posted it below. Take a look! What do you think? Do they look alike?

Leonardo da Vinci is considered to be one of the most greatest painters of all time. But, he was a lot more than just an artist. He also was an inventor, a scientist, a mathematician, an architect, and an engineer. He was a very busy person! Leonardo drew this self-portrait when he was 60 years old. That would have been in the year 1512. That was over 500 years ago! Can you guess what material he used to create this drawing? It was something that we have around today, red colored chalk. See his long, wavy hair? Just like Leonardo the lion's!
________________________________________________________________________________
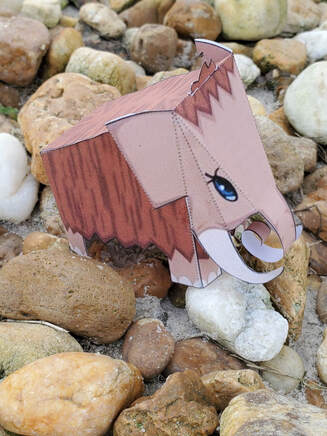
Meet Molly the Mammoth!
I found this printable paper toy on the internet and thought her big blue eyes were so pretty! I also like how her trunk curled up. But, I discovered a problem when I first printed this out. It was very small! It would have been difficult to do the folding and the gluing and the holding in place until it dried. So, I experimented with resizing. After 2 more printings, I finally got it large enough to be able to work with it more easily. It still requires careful cutting because it has to stay in 1 piece. I used a small pair of scissors that had pointy tips to cut with, and it still took me a while to finish cutting. But it was worth the time. Maybe you would like to make a mammoth for yourself. If so, go to my activities page and start scrolling down to find Molly!
I found this printable paper toy on the internet and thought her big blue eyes were so pretty! I also like how her trunk curled up. But, I discovered a problem when I first printed this out. It was very small! It would have been difficult to do the folding and the gluing and the holding in place until it dried. So, I experimented with resizing. After 2 more printings, I finally got it large enough to be able to work with it more easily. It still requires careful cutting because it has to stay in 1 piece. I used a small pair of scissors that had pointy tips to cut with, and it still took me a while to finish cutting. But it was worth the time. Maybe you would like to make a mammoth for yourself. If so, go to my activities page and start scrolling down to find Molly!
________________________________________________________________________________
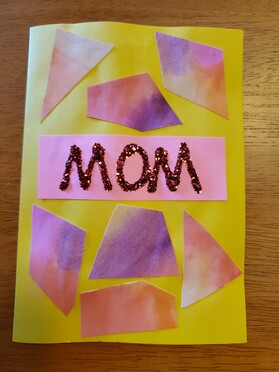
Happy Mother's Day to moms everywhere! I made this card out of a few simple materials like paper, paint, glue, and glitter. You can go to my activities page and scroll down to find instructions for making a card like this one. Or, you can decide to make one for your mom that looks totally different! That's one of the wonderful things about art. You can take a basic idea and change it to make it your own! And moms deserve to have something special on their special day. The very first Mother's Day was celebrated in 1908 in the state of West Virginia. A woman named Anna Jarvis wanted to honor her mother who had passed away a few years before. So, she came up with the idea of a special day to be held every year on the second Sunday in May. Be sure to give your mom a hug on May 10th!
________________________________________________________________________________
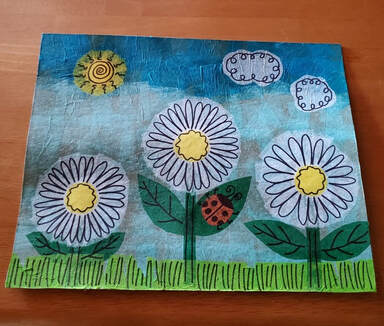
This Daisy Drawing project uses tissue paper which is glued down first, then left to dry. After the drying time, a black permanent paper is used to draw anything your imagination can create! I wanted to create a flower scene so I had to carefully plan where I placed the colors of tissue paper. I thought the little orange ladybug looked cute sitting on that leaf. White daisies might be the most common color of daisy, but did you know they come in lots of other colors, too? Such as pink, orange, red, and there's even a blue daisy! That gives me an idea for another tissue drawing...
________________________________________________________________________________
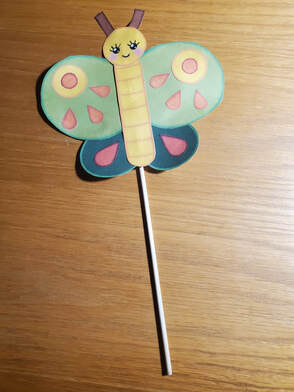
This is Emerald! She's a beautiful butterfly! Did you know that some people call butterflies "flying jewels"? That's because of the bright colors on some butterflies remind them of gemstones such as red rubies, blue sapphires, or green emeralds. Can you figure out why I decided to name my butterfly, Emerald? This was a really simple project to do and all you'll need is scissors and glue. Oh, and a stick if you want to make a stick puppet like I did. Stick puppets are fun to play with! You can pretend your butterfly is flying around. Maybe you could make a giant flower for your butterfly to land on. You know that butterflies love to drink the sweet nectar found in some kinds of flowers! The printable page and the instructions for making this butterfly are on my activities page. Print the page, find scissors and glue, and soon you'll have a butterfly of your own!
